
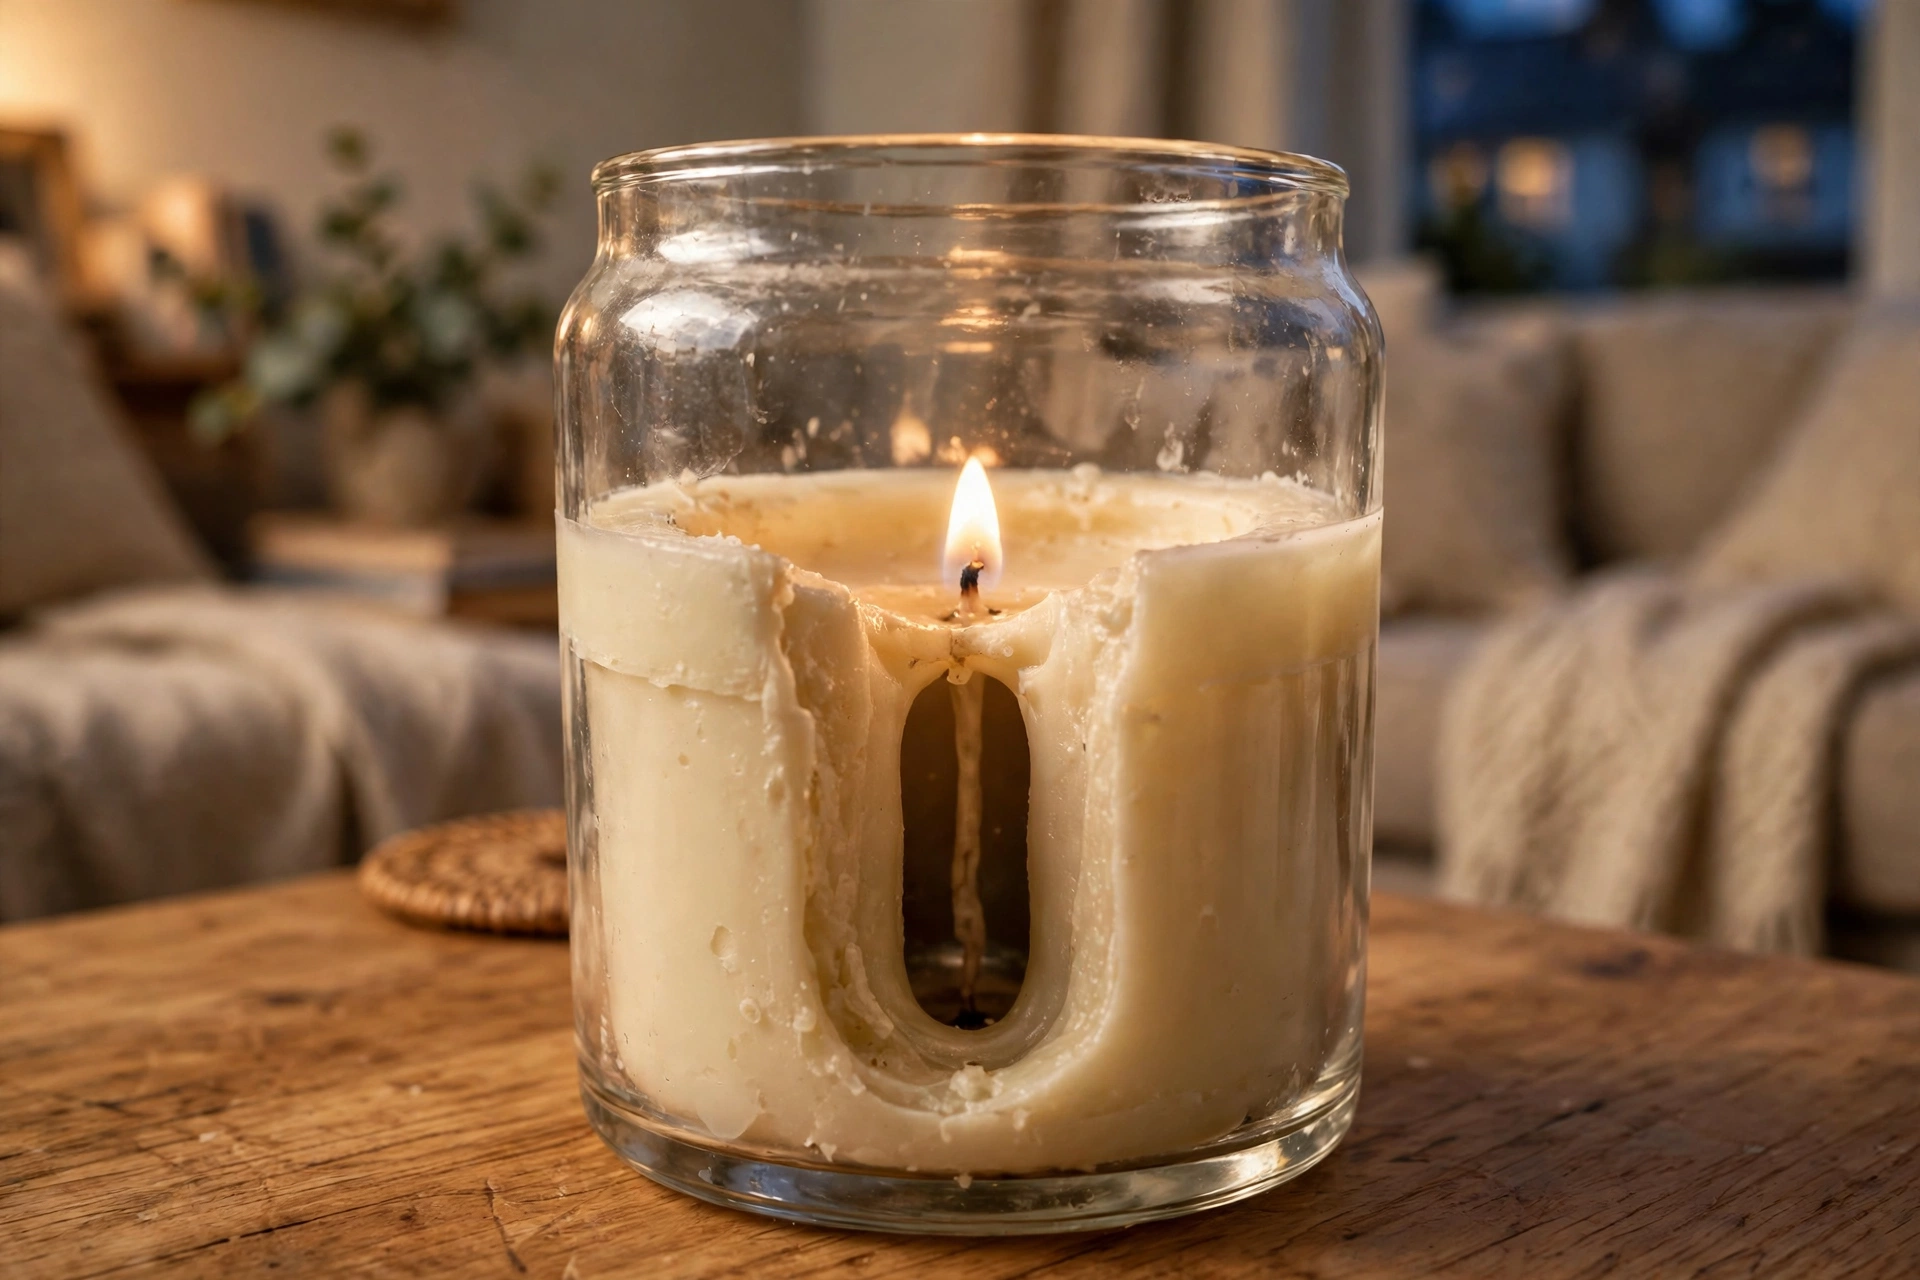
Candle Tunnelling: Causes and How to Fix It
Quick answer: Candle tunnelling happens when only the wax around the wick melts, leaving a ring of hard wax stuck to the sides of the jar. It is almost always caused by short first burns, a wick that is too small for the jar, or burning the candle in a draught. Most tunnelled candles can be saved: burn the candle for long enough to melt the full surface, use a foil tent to melt the stuck wax, or level the top with a heat gun. The real cure, though, is prevention, and it starts with the very first burn.
If you have ever looked at a candle you love and found a deep hole down the middle with thick walls of untouched wax, you have met tunnelling. It is the most common candle problem in UK homes, and it is frustrating because it wastes wax, weakens the scent, and can eventually drown the wick. The good news is that tunnelling is not a mystery and it is rarely the candle’s fault alone. Once you understand why wax behaves the way it does, you can fix most tunnelled candles and stop the next one from tunnelling at all.
What Tunnelling Is and Why Wax Has Memory
A candle does not burn wax directly. The flame melts a small pool of liquid wax around the wick, and that liquid is drawn up the wick and burned. The size of that melt pool is decided by the flame, and the flame is decided by the wick. If the melt pool never reaches the edges of the container, the wax at the edges stays solid, burn after burn.
This is where the idea of wax memory comes in. Wax tends to melt out to roughly the same diameter each time it burns. If the first burn only melts a small circle in the middle, later burns will follow that same small circle, and the tunnel gets deeper. The candle is not being difficult. It is simply repeating the pattern its first burn set.
Tunnelling is different from a candle that just burns unevenly for one evening. A draught can push a flame to one side for an hour, but tunnelling is a lasting ring of unmelted wax that survives burn after burn. The deeper the tunnel, the weaker the scent, because less wax is melting and releasing fragrance. Left long enough, the tunnel walls can collapse inward, bury the wick, and put the flame out.
Cause 1: The First Burn Was Too Short
This is the single biggest cause of tunnelling, and it is also the easiest to prevent. A new candle needs its first burn to last long enough for the melt pool to reach the full width of the container. For most jar candles, that takes longer than people expect.
The rule makers use is simple: allow about one hour of burning for every inch of the candle’s diameter. A candle 3 inches across needs roughly 3 hours on its first burn. A wide 4 inch candle may need 4 hours. If you light a new candle for 30 minutes while you have a bath and then blow it out, the melt pool has only reached the middle. From that point on, the candle will tend to tunnel.
This matters more than any later fix. You can rescue a tunnelled candle, as the fix ladder below shows, but you cannot undo a short first burn without melting the surface back out to the edges. If you only remember one thing from this guide, make it this: the first burn sets the candle’s whole life.
Cause 2: A Wick That Is Too Small or Off-Centre
Even with perfect burning habits, a candle can tunnel if the wick is wrong for the jar. A wick that is too small produces a flame too weak to melt wax out to the edges. The melt pool stays narrow no matter how long you burn the candle, and the tunnel forms anyway.
An off-centre wick causes a one-sided version of the same problem. The flame melts well on one side and barely touches the other, so wax builds up on the far side of the jar. You can spot this before you buy: look down at the candle and check the wick sits in the middle. If it leans to one side, straighten it gently while the wax is cool, or ask for a replacement if the candle is new.
Trimming matters here too, though it works in the opposite direction from what many people assume. A wick that is far too long gives a tall, flickering flame that can smoke and soot, but a wick trimmed very short can struggle to keep a strong melt pool going. Trim the wick to about 5mm before each burn, and no shorter. That length gives a steady flame without the mushrooming and smoking that a long wick causes.
Cause 3: Draughts and Short Sessions
The third cause is how the candle is burned day to day. A candle burned in a draught, beside an open window, near a door that opens often, or under an air vent, will have its flame pushed to one side. One side of the wax melts and the other does not, and over several burns that becomes a tunnel or a lopsided wall.
Short sessions cause the same result for a different reason. If you regularly light a candle for 20 or 30 minutes and blow it out before the melt pool has spread, the wax never gets the chance to level out. This is the most common pattern in busy homes: a candle lit for a quick evening wind-down, then snuffed before it has really got going. The candle is not at fault, but the habit quietly builds a tunnel.
Heat and cold in the room play a smaller part. A very cold room slows the melt pool a little, and a warm room speeds it slightly, but neither causes tunnelling on its own. Draughts and short burns are the real culprits in this group.
The Fix Ladder: From Gentlest to Strongest
Work through these fixes in order. Start with the gentlest method that fits how bad the tunnel is, and only move up the ladder if the gentler method does not level the wax.
Step 1: The long burn
This is the fix to try first for a shallow tunnel, where the ring of stuck wax is less than about 1cm high. Light the candle and let it burn until the melt pool reaches the edges of the container. That may take 2 to 3 hours, so choose an evening when you will be in the room the whole time. Never leave a burning candle unattended, and never burn it for longer than the maker recommends, usually no more than 4 hours at a time.
As the pool spreads, the stuck wax at the edges will melt and join it. Let the candle cool completely before you light it again. One long burn often fixes a shallow tunnel outright, and it is the safest method because it uses the candle exactly as intended.
Step 2: The foil tent
For a deeper tunnel, where a long burn alone does not reach the stuck wax, the foil tent is the classic fix. Tear off a piece of kitchen foil, fold it into a tent shape with a hole in the top for the flame, and place it loosely over the candle, leaving space for air to reach the flame. The foil traps heat above the wax, which melts the tunnel walls down into the pool.
Keep the hole wide enough that the flame is not starved of air, and never leave a foil-tented candle unattended. Check it every 20 minutes or so. After 1 to 2 hours, the top should be much flatter. Take the foil off carefully, as it will be hot, and let the candle cool before trimming the wick back to 5mm.
Do not use foil as a routine habit. It is a rescue method for a candle that has already tunnelled, not a way to burn every candle. Used too often, trapped heat can overheat the jar, so save it for real tunnels.
Step 3: A heat gun or hair dryer
If the tunnel is deep and the wick is starting to sit low, a heat gun on its lowest setting, or a hair dryer on hot, can level the surface directly. Hold it a few inches above the wax and move it slowly around the stuck ring until the wax melts and levels. Work in short bursts and stop as soon as the surface is flat. This method gives you the most control, and it is the best choice when the wick is nearly buried, because you can melt wax away from the wick rather than waiting for the flame to do it.
Be careful with the jar. Do not hold heat in one spot for long, and let the candle cool fully before relighting it. If you do not own a heat gun, a hair dryer works well enough for most jar candles, though it takes a little longer.
Step 4: Wax rescue for a badly tunnelled candle
When the tunnel is very deep, the wick is buried, or the candle will not stay lit at all, rescue the wax instead of fighting the tunnel. Let the candle cool completely, then use a butter knife to carefully break off the stuck ring of wax and lift it out. Melt that wax in a heatproof jug in a pan of simmering water, pour it back over the top of the candle to level the surface, and let it set fully before relighting.
Only do this if you are comfortable handling hot wax, and never melt wax directly in a pan over a flame. If the candle is a cheap one, or the wick is damaged, it is honestly better to let it go and start a new candle with a proper first burn. Rescue is worth it for a candle you love, not for every candle you own.
Tunnelling by Wax Type
Not all wax tunnels in quite the same way, and knowing your wax helps you judge how much patience a fix needs.
Soy wax is softer and melts at a lower temperature than paraffin, so soy candles often respond well to the long burn and foil tent methods. They also tend to leave a slightly uneven top after cooling, which is normal for soy and not a sign of tunnelling.
Paraffin wax is harder and holds its shape more firmly, so a paraffin tunnel can look neater and deeper, with clean straight walls. Paraffin usually needs the full long burn or foil tent to level out, and it rewards a proper first burn more than any other wax.
Beeswax burns hotter and slower, and pure beeswax candles are less prone to tunnelling in the first place, but they can still tunnel in a wide container with a small wick. Because beeswax is stickier when melted, use the heat gun method gently if you need to level it, and give it plenty of cooling time before relighting.
Blended waxes, which many UK makers use, sit between these behaviours. The fix ladder works for all of them. The wax type changes how quickly the fix works, not which fix to choose.
The Prevention Routine for Every New Candle
Fixing a tunnel is satisfying, but never needing to is better. This routine takes no extra effort once it is a habit:
- First burn: go the full width. Allow about 1 hour per inch of diameter, and do not blow the candle out until the melt pool reaches the edges. Plan the first burn for an evening when you will be home.
- Trim the wick to 5mm before every burn. A steady, correctly trimmed wick gives an even melt pool. Snip off the mushroomed tip if the wick has grown one.
- Burn for at least 1 to 2 hours at a time. Short 20 minute burns are the fastest way to build a tunnel. If you only have a short time, choose a smaller candle or a different format for that evening.
- Keep the candle out of draughts. Move it away from open windows, doors, fans and vents. A still spot gives an even flame and an even melt pool.
- Let the candle cool fully between burns. Relighting a hot candle with a liquid pool already formed can push the melt unevenly. Cool, trim, relight.
- Stop at the last centimetre. When about 1cm of wax remains, stop burning the candle. Burning a jar down to nothing risks overheating the glass and gives a poor final burn anyway.
Follow this routine and most candles will burn down flat, with almost no wax wasted on the sides.
When a Candle Cannot Be Saved
Some candles are beyond rescue, and knowing when to stop saves you time and frustration. Let a candle go when the wick has burned down below the wax and cannot be relit, when the jar is cracked or heat damaged, when the wax smells burnt or unpleasant even after levelling, or when the candle has tunnelled so deeply that the remaining wax is less than a centimetre thick in the middle. In those cases, clean out the jar for reuse if you like, and start fresh with a proper first burn. A candle is meant to be enjoyed, not fought with for weeks.
Frequently Asked Questions
Why does my candle tunnel even though I burn it for hours?
Usually because the first burn was short, even if later burns are long. Wax memory means the candle keeps returning to the diameter set on the first burn. Use the foil tent method to reset the surface, then burn it for full sessions afterwards.
Does the foil method damage the candle?
Not if it is used correctly and only as a rescue. Keep the foil loose, leave a hole for the flame, never leave the candle unattended, and check it regularly. Do not use foil on every burn, and stop if the jar feels excessively hot.
Can you fix tunnelling without foil?
Yes. A long burn fixes shallow tunnels, and a heat gun or hair dryer levels deeper ones. Foil is convenient, but it is not essential. The long burn is the safest method of all.
Should I pour out melted wax to fix a tunnel?
Pouring off the melt pool is sometimes suggested, but it wastes scented wax and can leave the wick too long for the new level. It is better to melt the stuck wax down into the pool, using foil or a heat gun, than to pour wax away.
Why does my candle tunnel on one side only?
That is almost always a draught or an off-centre wick. Move the candle to a still spot, check the wick sits in the middle, and trim it to 5mm. A one-sided tunnel will often level out with one long burn in a draught-free spot.
My candle smells weak since it tunnelled. Is that normal?
Yes. A tunnelled candle melts less wax, so it releases less fragrance. Fixing the tunnel usually restores the scent, because the full melt pool is releasing fragrance again. If the scent stays weak after the surface is flat, the cause is more likely room size or fragrance strength, as covered in our guide to why you can’t smell your reed diffuser, which explains how scent behaves in a room.
How do I stop a new candle from tunnelling?
Give it a full first burn, about 1 hour per inch of diameter, trim the wick to 5mm before each burn, keep it out of draughts, and burn it for at least 1 to 2 hours at a time. That routine prevents tunnelling in almost every candle.
A Flat Top Is a Happier Candle
Candle tunnelling looks like a fault, but it is usually just a habit: a short first burn, a draughty spot, or sessions that end too soon. Fix the tunnel with a long burn, a foil tent, or a heat gun, in that order, and then let the prevention routine do the work for the next candle. A candle that burns flat gives you more scent, more hours, and far less wasted wax, which is the whole point of lighting it in the first place.
If you prefer a fragrance format that does not need this kind of care, a reed diffuser works the other way round: it scents a room steadily for weeks without a flame. Our guide to how long do reed diffusers last sets out honest lifespans by bottle size, so you can compare the two formats before you choose your next one.