
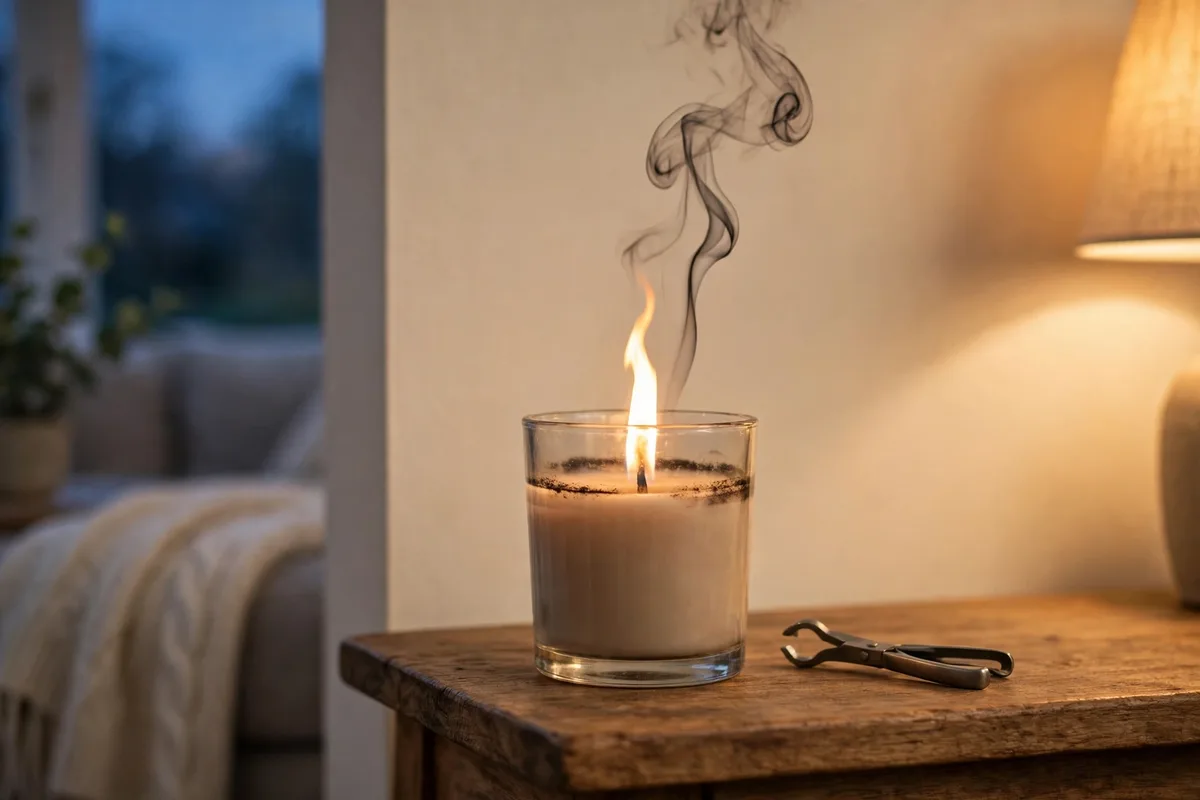
Candle Sooting and Black Smoke: Causes and Fixes
Quick answer: Black smoke from a candle is soot, unburned carbon from a flame that is not burning cleanly. In most cases the fix takes thirty seconds: put the candle out, let it cool, trim the wick to about 5mm, move the candle out of any draught, and relight it. If the smoke comes back, the cause is one of four things: a wick that is too long or has mushroomed, a draught flickering the flame, a burn session that has run too long, or the candle itself. The symptom table below tells you which one you have and what to do about it, and the last section covers cleaning soot off walls, jars and ceilings.
Black smoke is the candle problem that looks the most alarming and is usually the easiest to fix. A thin trail of black smoke curling from the flame, a black ring building up inside the jar, or a grey smudge appearing on the wall above the candle all point to the same thing: the flame is not burning all the fuel it is given. A steady flame burns off almost all the soot it makes. A disturbed flame lets some of it escape, and that escaped soot is what you see as black smoke and what settles as black marks.
That is also why soot is a useful diagnostic. It is not random. The way the smoke behaves tells you what is wrong, and each cause has a different fix. A wick problem smokes steadily. A draught problem smokes in puffs. A session that has run too long starts smoking hours in. Learning to read the smoke means you can fix the cause instead of just wiping the marks away and watching them come back.
This guide is written for buyers, not makers. It covers what soot is, the four causes in order of how often they occur, the fix sequence to work through, and how to clean soot off the surfaces it lands on. It does not cover air quality in depth, and it makes no health claims: if you want the ventilation and safety rules that apply to every candle, they are in our scented candles guide.
The 30-Second Fix
If your candle is smoking right now, do this first and read the rest afterwards.
- Put the candle out. Use a snuffer or a lid, not a blow, so you do not send a puff of soot across the room.
- Let the candle cool completely. Do not touch the wick while the wax is hot and liquid.
- Trim the wick to about 5mm, roughly a quarter of an inch. If the wick tip has grown a dark, bulbous cap, trim the whole cap away.
- Move the candle out of any draught: away from open windows, doorways, fans, vents and air conditioning.
- Relight it and watch the flame for a minute. A healthy flame is short, steady and upright, with no visible smoke.
If the flame burns clean after that, the problem was the wick or the draught, and you are done. If the smoke comes back straight away, work through the symptom table below to find the cause that the quick fix did not reach.
One thing to check before you start: make sure the smoke you are seeing is actually black soot smoke. The white wisp that rises for a few seconds after you put a candle out is different. That is mainly unburned or part-burned wax vapour, not soot, and it does not mean the candle is sooting. It is normal, it clears in seconds, and it needs no fix. This guide is about black smoke while the candle is burning, and black marks left behind afterwards.
What Soot Is Telling You
Soot is unburned carbon. A candle flame burns wax vapour, and when the flame is burning well, almost all of that vapour is consumed. When something disturbs the flame, some of the vapour escapes unburned, and it cools into tiny black carbon particles. Those particles are the smoke you see, and they are what settles on the inside of the jar, on the wall above the candle and, over time, on the ceiling.
The important point is that soot is a symptom of incomplete combustion, not a property of the candle alone. The same candle can burn cleanly on one evening and smoke badly on the next, depending on the wick length, the air around it and how long it has been burning. That is good news, because it means most sooting is fixable by changing how the candle is burned, not by throwing the candle away.
There is one exception, and it is worth knowing early so you do not waste time on fixes that cannot work. If a candle smokes even with a trimmed wick, in still air, in a normal-length session, the problem is inside the candle: the wick is the wrong size for the jar, or the fragrance load is too high for the wax to burn cleanly. No amount of trimming or moving will fix that candle, and the honest answer is to stop using it and choose differently next time. The symptom table covers this case last, so you can rule out the fixable causes first.
The Symptom Table: What You See, What It Means, What to Do
Use this table to match what you are seeing to the cause, then read the section for that cause.
| What you see | What it means | What to do |
|---|---|---|
| Tall flame with a black tip, steady stream of black smoke | Wick too long | Extinguish, cool, trim to 5mm, relight |
| Dark, bulbous cap on the wick tip, flame larger than usual | Wick mushrooming | Extinguish, cool, trim the whole mushroom away before the next burn |
| Flame dancing or leaning to one side, smoke in puffs | Draught | Move the candle to a still spot, away from windows, doors, fans and vents |
| Smoke starts after two or three hours of clean burning | Session too long, melt pool and jar overheating | Put the candle out, let it cool fully, relight later; keep sessions under four hours |
| Black marks inside the jar only, flame looks normal | Soot from earlier burns, or a wick that was long before | Wipe the jar between burns, keep the wick trimmed from now on |
| Smoke even with a trimmed wick in still air | The candle itself: wick and wax mismatch, or too much fragrance oil | Stop using the candle; contact the maker if it is new |
| White smoke for a few seconds after putting the candle out | Unburned wax vapour, not soot | Normal, no fix needed; use a snuffer or lid next time to reduce it |
If your symptom is not in the table, start with the 30-second fix anyway. It covers the two most common causes, and it costs nothing to try.
Cause 1: A Long or Mushroomed Wick
A wick that is too long is the single most common cause of candle soot, and it is the easiest to fix. A long wick produces a taller flame, and a taller flame pulls wax vapour up faster than it can burn cleanly. The excess vapour escapes as soot. The flame also flickers more, which makes the problem worse, and the wick tip curls into a mushroom shape that feeds the cycle: the mushroom makes the flame larger, the larger flame makes more soot, and the soot builds the mushroom further.
Wick mushrooming deserves a closer look, because it is the version of this problem that people miss. A mushroom is a dark, bulbous cap of carbon that grows on the tip of the wick during a burn. It looks like a tiny black ball sitting on the end of the wick, and it makes the flame burn larger and less steadily than it should. It is most common in candles with a high fragrance load, because the extra fragrance oil gives the flame more fuel than it can burn cleanly, and the unburned carbon collects on the wick tip. You will also see it in candles that have been burned for a long session without a trim, because the wick has had hours to grow the cap.
The fix is the same for a long wick and a mushroomed one, and it is the 30-second fix from the start of this guide: extinguish, cool, trim to about 5mm. For a mushroomed wick, trim the whole dark cap away, not just the top of it. Trimming a mushroom while the candle is still warm and the wax is liquid is tempting, and it is a bad idea: the wick is hot, the wax is hot, and a trimming dropped into the melt pool becomes debris that will smoke and can catch fire. Wait until the wax is cold and solid, then trim.
The prevention is a habit, and it is the cheapest habit in candle care. Trim the wick to about 5mm before every burn, without exception. The figure comes from the same care guidance used across this site: the Danish EPA advice and the care cards of several makers put the range at 3 to 5mm, and our own care guide uses 5mm, so this page uses 5mm for consistency. If the label on your candle gives a different figure, follow the label. Never trim a lit candle, and never trim the wick shorter than about 5mm in the hope of a smaller flame: a wick cut too short can drown in its own melt pool and go out, or struggle to keep a proper flame at all.
A wick trimmer does this job neatly and catches the cut piece. Small scissors or nail clippers work just as well if you tip the candle and catch the trimming before it falls into the wax. If a piece of trimming does fall into the melt pool, fish it out with a cocktail stick once the wax has set, or while the wax is still liquid if you can do it safely. Debris in the melt pool is a soot risk and a fire risk, and it belongs in the bin, not in the candle.
The full care routine, of which wick trimming is one part, is in our guide on how to make a scented candle last longer. This page is the soot diagnosis; that page is the routine that stops most sooting before it starts.
Cause 2: Draughts and Flicker
If the flame is dancing, leaning to one side, or smoking in puffs rather than in a steady stream, the cause is moving air. A draught pushes the flame off centre, so it burns unevenly. One side of the flame gets more air and burns hotter, the other side gets less and burns incompletely, and the incomplete side releases soot in puffs every time the flame wavers. A candle in a draught can smoke badly even with a perfectly trimmed wick, which is why the 30-second fix includes moving the candle as well as trimming it.
The draughts that cause this are ordinary ones, and they are easy to overlook because the candle sits in a room that feels still to you. An open window, even a few inches, is enough. So is a door that opens often, a ceiling fan, a desk fan, an air vent, a radiator with a strong convection current, or a candle placed in a hallway where people walk past and stir the air. A candle on a windowsill is the classic case: the glass is cold, the air beside it is moving, and the flame never settles.
A chamber study published in 2021 (Andersen and colleagues, Indoor Air) found that all five candle types tested gave off mostly soot once moving air disturbed the flame, which matches what you see at home: a candle that burns cleanly in a still room will smoke in a draughty one, whatever the wax or the maker. The study is a useful reminder that the air around the candle matters as much as the candle itself.
The fix is to find still air. Move the candle away from windows, doors, fans and vents, and away from walkways where people pass. A spot on a stable surface in the middle of a room, at least a foot from any wall, is usually still enough. If the flame still leans after you have moved the candle, check for a draught you cannot feel: hold a thin strip of tissue near the candle and watch whether it moves. If it does, the air is moving, and the candle needs a different spot.
Do not try to solve a draught problem by putting the candle inside something. A lantern or a hurricane glass can shield a flame, but it also traps heat, and trapped heat brings its own problems, which the next section covers. The answer to moving air is still air, not a cover.
Cause 3: Overlong Sessions and Overheated Jars
If a candle burns cleanly for the first hour or two and then starts smoking, the session has run too long. After about four hours the melt pool gets very hot, the flame grows taller, and the wax is consumed faster than the fragrance can keep up. The glass overheats as well, and a hot jar feeds heat back into the melt pool, which makes the flame larger still. The candle that smelled lovely at the start of the evening often smells weaker and smokes more by the end of it, because the wax is overheating rather than burning cleanly.
The rule is simple and it applies to every burn, not just the first one: do not burn a candle for more than four hours at a time. Two to four hours is the window that avoids both problems at once. Shorter than that and the melt pool may not reach the edges, which feeds tunnelling. Longer than that and the wax overheats, the flame grows, and soot increases. The full melt pool matters here too: the first burn should last long enough for the melt pool to reach the edges of the container, about one hour for every inch of the candle’s diameter, and the tunnelling guide explains that rule in full. But a full melt pool is not a reason to keep burning past four hours. If a very wide candle has not reached the edges within four hours, put it out, let it cool completely, and finish the job on the next burn.
The signs that a session has run too long are easy to spot once you know them. The flame is taller than it was when you lit the candle. The glass is hot to the touch, not just warm. The scent is weaker than it was an hour ago, or it has taken on a burnt edge. Black marks are starting to appear on the inside of the jar above the wax line. Any one of these is a reason to put the candle out and let it cool.
Cooling matters as much as stopping. A candle that is put out and relit while the wax is still liquid will smoke more on the next burn, because the melt pool is already hot and the wick is sitting in warm wax. Let the candle cool completely, trim the wick back to 5mm, and relight it later. The wait is part of the fix, not wasted time.
Cause 4: The Candle Itself
If you have trimmed the wick, moved the candle out of every draught, and kept the session under four hours, and the candle still smokes, the problem is inside the candle. There are two versions of this, and they have the same answer.
The first is a wick and wax mismatch. The wick is too large for the jar, so the flame is bigger than the melt pool can support, and it burns incompletely whatever you do. You can spot this before you buy: a wick that looks thick for the size of the jar, or a candle that has always smoked from the very first burn, even when it was new and the wick was short. A wick that is the wrong size cannot be fixed by trimming, because trimming changes the length, not the thickness, and the thickness is what decides how much fuel the flame draws.
The second is over-fragrancing. A candle loaded with more fragrance oil than the wax can carry and burn cleanly will soot, because the excess oil cannot fully combust and escapes as soot instead. This is most common in very strongly scented candles, and in candles where the maker has pushed the fragrance load to make a strong cold throw, the scent you notice in the shop, at the expense of a clean hot throw. The candle smells powerful unlit and smokes once lit, and no change in how you burn it will fix that, because the cause is the recipe, not the routine.
The honest answer for both versions is to stop using the candle. If it is new, contact the maker and tell them it smokes with a trimmed wick in still air: a good maker will want to know, and will usually replace it. If it is an old candle that has always smoked, let it go and choose differently next time. A candle that smokes despite correct burning is a candle that was not made well, and persisting with it will only put more soot on your walls.
Wax type plays a part here, but it is a smaller part than the wick and the fragrance load, and it is not a reason to blame one wax outright. Paraffin and synthetic fragrance oils tend to produce more soot than soy or beeswax with phthalate-free fragrance, and over-fragranced candles of any wax will soot. The full comparison of the three waxes, including how each one behaves on soot, is in our guide to soy vs paraffin vs beeswax candles. Read it before you buy your next candle, not after it starts smoking.
The Fix Sequence, in Order
If you have read the causes and you want the whole thing as a single sequence, here it is. Work through it in order, and stop at the step that fixes the smoke.
- Trim the wick. Extinguish, cool, trim to 5mm, remove any mushroom cap. Relight and watch for a minute. This fixes most sooting on its own.
- Move the candle. Out of draughts, away from windows, doors, fans and vents, onto a stable surface in still air. Relight and watch. This fixes the smoke that comes in puffs.
- Shorten the session. Put the candle out before four hours, let it cool completely, trim again, and relight later. This fixes the smoke that starts hours into a burn.
- Check the melt pool. If the pool has never reached the edges, the first burn was too short, and the candle is tunnelling as well as sooting. The fix ladder for that is in our guide to candle tunnelling, and it starts with a long burn to level the surface.
- Accept the candle is the problem. If the smoke survives steps one to four, the wick is the wrong size or the candle is over-fragranced. Stop using it, contact the maker if it is new, and choose differently next time.
Work the sequence in order, because each step is cheaper and easier than the next, and because a candle that needs step five will still benefit from steps one to three while you decide. Do not jump to step five on the first sign of smoke. Most sooting is a wick or a draught, and most sooting is fixed in thirty seconds.
Soot on Walls, Jars and Ceilings: Cleaning and Prevention
Soot that has already landed needs cleaning, and the method matters, because soot smears easily and the wrong first step makes the mark worse.
Start with the jar, because it is the easiest and the one you will clean most often. Wipe the inside of the jar with a dry cloth between burns, once the wax has cooled and the glass is cool to the touch. Soot on glass comes off easily when it is fresh and dry. If the marks have built up over many burns, a little warm water and mild dish soap on a damp cloth will lift them. Dry the jar before the next burn, because water in the wax is a problem of its own.
For walls and ceilings, the order of operations is the whole trick. Start dry, and stay dry until the loose soot is gone. Use a dry-cleaning sponge, also sold as a chemical sponge or soot sponge, and wipe in one direction only, from the top of the mark downwards. Do not scrub back and forth, and do not wet the sponge or the wall first. Water turns dry soot into a smear that drives the carbon into the paint, and a smear is far harder to remove than a dry mark. Work in overlapping strokes, and turn or replace the sponge as it loads up with soot.
Once the dry pass has lifted as much as it can, move to a damp clean. Mix a small amount of mild dish soap or white vinegar into warm water, dampen a cloth, wring it out well, and blot the mark gently rather than rubbing it. Blotting lifts soot out of the surface; rubbing pushes it in. Work from the outside of the mark towards the centre, so you do not spread the stain wider than it already is. Rinse the cloth often, and change the water when it turns grey. For a large or stubborn mark, repeat the damp pass rather than pressing harder.
A few cautions apply. Do not use a coloured cloth, because the dye can transfer onto a light wall. Do not use bleach or a harsh cleaner on a painted wall unless you have tested it on a hidden patch first, because it can lift the paint along with the soot. Do not use a vacuum cleaner with a brush head on a soot mark, because the brush will drive the carbon into the surface. And if the soot covers a large area of ceiling, or the wall is textured, it may be a job for a professional cleaner rather than a sponge, because textured surfaces hold soot in a way that flat paint does not.
Prevention is simpler than cleaning, and it is the same list as the fix sequence. Keep the wick trimmed, keep the candle out of draughts, keep sessions under four hours, and keep the candle away from walls and ceilings where the warm air rises. A candle placed at least a foot from the wall will put far less soot on it than one pushed against the skirting board, because the warm air has room to disperse before it reaches the surface. Wiping the jar between burns also helps, because a clean jar reflects less soot back into the flame.
One last prevention habit is worth building. Put the candle out with a wick dipper or a snuffer instead of blowing it out. Blowing sends a puff of smoke across the room, and that puff carries soot onto the wax surface, the inside of the glass, and anything nearby. A snuffer, or a lid placed gently over the flame, puts the candle out without smoke and without disturbing the wick, which then burns straight and clean next time. It is a small tool, it costs very little, and it is the single easiest way to keep soot off your walls.
When Soot Means Stop, Not Fix
Most sooting is a fixable habit. A small number of cases are a reason to stop using the candle, and it is worth naming them plainly so you do not keep fixing a candle that should be retired.
Stop using the candle if the jar is cracked or heat damaged, because a cracked jar can fail while it is burning. Stop if the wax smells burnt or unpleasant even after the surface has been levelled and the wick trimmed, because the fragrance has broken down and the candle will not recover. Stop if the candle smokes heavily from the first burn even with a trimmed wick in still air, because the wick or the fragrance load is wrong and no routine will fix it. And stop, as with every candle, when about 10mm of wax remains at the bottom of the container, because the last centimetre of wax cannot form a proper melt pool and the flame will burn directly against the glass.
None of these is a failure on your part. A candle is a manufactured product, and some of them are made badly. The fix sequence in this guide will tell you quickly which kind you have: a good candle that needs better burning, or a bad candle that needs replacing. Knowing the difference saves you the time of fixing the same candle week after week, and it saves your walls as well.
Frequently Asked Questions
Why is my candle giving off black smoke?
Black smoke is soot, unburned carbon from a flame that is not burning cleanly. The usual causes, in order, are a wick that is too long or has mushroomed, a draught flickering the flame, a burn session that has run past four hours, or a candle whose wick or fragrance load is wrong for the jar. Trim the wick to 5mm, move the candle out of draughts, and keep sessions under four hours. That fixes most sooting in thirty seconds.
How do I stop my candle from smoking?
Put the candle out with a snuffer or a lid, let it cool, trim the wick to about 5mm, move the candle to a still spot away from windows, doors, fans and vents, and relight it. Keep each burn under four hours, and trim the wick before every burn. If the smoke comes back despite all of that, the candle itself is the problem, and it is better to stop using it than to keep fighting it.
What is wick mushrooming?
Mushrooming is a dark, bulbous cap of carbon that grows on the tip of the wick during a burn. It makes the flame larger and less steady, and it feeds black smoke. It is most common in heavily fragranced candles and in candles burned for long sessions without a trim. Fix it by extinguishing the candle, letting it cool, and trimming the whole mushroom away before the next burn.
How long should a candle wick be?
About 5mm, roughly a quarter of an inch, before every burn. That figure matches the Danish EPA advice and the care cards of several makers, which put the range at 3 to 5mm. If the label on your candle gives a different figure, follow the label. Never trim a lit candle, and do not trim the wick much shorter than 5mm, because a very short wick can drown in its own melt pool.
Why does my candle only smoke after a few hours?
Because the melt pool and the jar have overheated. After about four hours the wax is very hot, the flame grows taller, and the candle burns incompletely, which produces soot. Put the candle out, let it cool completely, trim the wick, and relight it later. Keep sessions to two to four hours.
Is black smoke from a candle dangerous?
Black smoke is soot, which is fine carbon particles, and it is a sign that the candle is burning incompletely. This guide does not make health claims about soot levels or effects, and no figure for them is given here. What is clear is that a candle that smokes heavily is a candle that is not burning as its maker intended, and the fix sequence in this guide will usually stop the smoke. Burn candles in a ventilated room, keep sessions under four hours, and never leave a burning candle unattended. The full safety and ventilation rules are in our scented candles guide.
How do I clean soot off a wall?
Start dry, with a dry-cleaning sponge, wiping in one direction from the top of the mark down. Do not wet the wall first, because water turns dry soot into a smear. Once the dry pass has lifted what it can, blot gently with a cloth dampened in warm water with a little mild dish soap or white vinegar, working from the outside of the mark towards the centre. Rinse the cloth often.
How do I clean soot off a candle jar?
Wipe the inside of the jar with a dry cloth between burns, once the glass is cool. For built-up marks, use warm water and mild dish soap on a damp cloth, then dry the jar before the next burn. Keeping the jar clean between burns stops old soot from being drawn back into the flame.
Why is there white smoke when I blow out my candle?
That white wisp is mainly unburned or part-burned wax vapour, not soot, and it is normal. It clears in a few seconds and needs no fix. Using a snuffer or a lid instead of blowing the candle out reduces it, and it also keeps soot off the wax surface and the inside of the glass.
Does the wax type affect sooting?
Yes, but less than the wick and the air around the candle. Paraffin and synthetic fragrance oils tend to produce more soot than soy or beeswax with phthalate-free fragrance, and an over-fragranced candle of any wax will soot. A long wick or a draught will make any wax smoke. The full wax comparison is in our guide to soy vs paraffin vs beeswax candles.
Sources
The soot facts in this article restate the consensus of three maker and DIY pages, all read on 10 November 2026. All three sell or make candles, so none of them is neutral, and this article uses them as sources for the facts they agree on, not as authorities to copy:
- Yarralight, “Black Smoke from Candle”: https://yarralight.au/blogs/news/black-smoke-from-candle
- DIY Products 101, “Candle Black Smoke and Soot”: https://www.diyproducts101.com/candle-black-smoke-and-soot/
- ReCandle Company, “How to Remove Candle Soot”: https://recandlecompany.com/blogs/refillable-candle-collective/how-to-remove-candle-soot
Two studies are cited as those pages cite them, not as papers read directly for this article: Pagels and colleagues, Journal of Aerosol Science, 2009, on soot from a steady candle flame; and Andersen and colleagues, Indoor Air, 2021, on soot from candles burned in moving air. The wick-trimming figure of 3 to 5mm comes from Danish EPA advice as reported by Yarralight. Where the three sources disagreed, this article says so, or leaves the point out. Where they agreed, this article says what they agreed on, and adds the buyer-first structure they do not offer: the 30-second fix first, the symptom table, and the cleaning sequence.